Day 24 Sunday, September 19 -- Coromandel Peninsula to Auckland
Synopsis
We got up at 3am to take a moonlight soak at the Hot Beach. We did this because the hot springs, which surface on the beach and flow directly into the ocean, are only above water during low tide, and we didn’t feel like hanging out in the area until the next low tide that afternoon. The stars were magnificent, and despite some moments of discomfort, we had a nice soak in the hot tub that we dug in the sand, fed by 60 degree C hot spring (youch!). We took a nap before heading over to Cathedral Cove, a serene cove with turquoise blue water reminiscent of our trip to Tahiti, with tall white-cliffed features jetting out of the ocean and an arch for which the cove was given it’s name. We headed northeast towards Auckland late in the morning and arrive in Auckalnd around mid-afternoon. We decided not to go too far north of Auckland since it was getting late, and went to the thermal pools at Weiwera, which was like a luke-warm water park. We headed back to downtown Auckland to have dinner at the top of the Sky Tower, a large, impressive-looking concrete tower that’s twice as tall as any other building around it and the tallest in the southern hemisphere. We spent our last night just north of downtown in an urban cabin/campground.
Detailed Journal
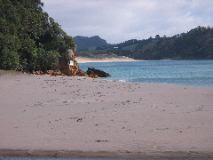
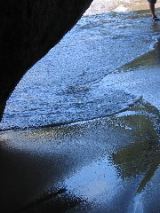
We woke up to the sound of one of our cell phone alarms at 2:50am. We somewhat reluctantly got out of bed, put on our swimsuits, grabbed our shovel, star chart, towels and lantern, and headed for the beach. It was a bit chilly outside, but not bad as long as the wind wasn’t blowing (which it did from time to time). We walked out on the beach and went through a fairly frustrating process of digging several holes only to find cold water below. Just about the time we were ready to give up, Jason walked up the beach a little and found a sign indicating the Hot Water Beach. Not too far beyond the sign there were trickles of water that were, sure enough, hot! We put our stuff on a rock and started digging a hole in the path of one of the small streams of hot water. Before too long, we were in business, lying back in a hot pool of water, looking up at a starry sky. It wasn’t entirely comfortable, needing to constantly readjust since the hot water stream was too hot and had to be constantly mixed with the cooler water in our hole. But, we managed to stay relatively comfortable for about a half hour before heading back for the van. Jason initiated a design for the hot bath that Lynette perfected. The perfect hot beach experience was to dig a hole and create a trench on either side of the hole that could be used to feed our pool with hot water on demand, but block off the hot water when the pool got to hot. Ramblin' Wrecks, Baby!
The wind made the journey back to the van a bit unpleasant, but we made it and washed the sand off our swimsuits at a spigot near our van. Sand was just about everywhere on our bodies, and in turn all over the floor of the van before we were finished. We showered and popped open our bottle of champagne (Lindauer Brut, New Zealand Sparkling Wine), which was thoroughly nasty (Lynette thought it was a typical brut champagne). We decided to get a couple more hours of sleep before tackling the day.
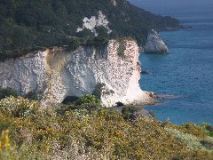
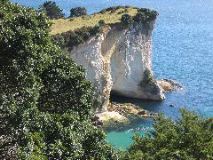
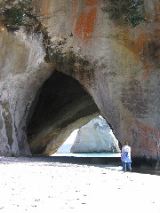
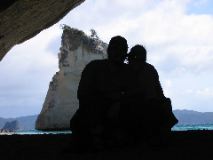
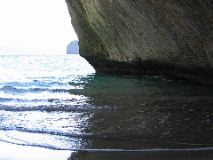
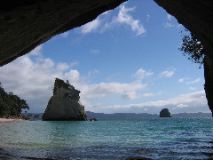
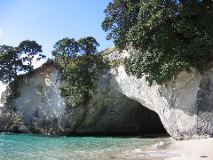
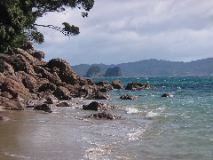
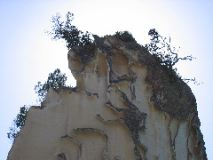
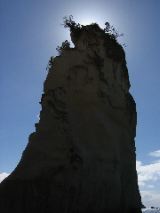
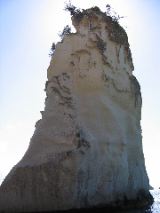
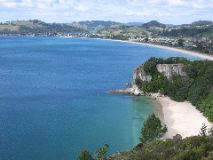
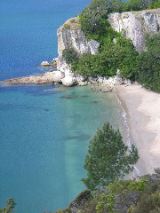
We got up around 830, filled our water tank, paid for the campsite and drove to the entrance of the Hot Springs Beach to take a picture of our early morning adventure. We then headed for Cathedral Cove, a 40-minute walk to a white sand beach surrounded by white cliffs. The beach is separated in the middle by a large rock outcrop with a large arch that you can walk through. The arch looks like a cathedral, thus the name of the cove. The water was several different shades of blue and turquoise. The colorful water and the gentle lapping of waves on the white sand beach reminded us of Tahiti. However, the chilly wind and cold water spoiled the illusion. All in all, the cove was quite spectacular and well worth the hike out and back.
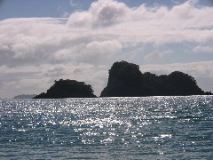
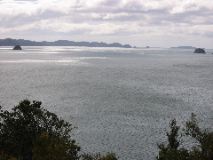
Our next stop was Shakespeare Cliffs, around Mercury Bay from Cathedral Cove a bit further. The top of these cliffs offered a nice overlook of Mercury Bay and Cooks Beach, where Captain Cook had landed so that his scientists could observe the transit of Mercury (thus the name of the bay). We decided not to continue around Coromandel Peninsula and took the quick way across the mountain range towards Aukland.
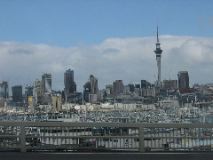
We had a fairly uneventful drive to Auckland. Traffic picked up a bit, but being a Sunday, it wasn’t too bad. We drove through downtown and across the harbor on a beautiful-looking bridge. We decided to continue north of Aukland, stopping at a petrol station with an i-site to get some suggestions for the rest of the afternoon. The lady at the i-site suggested that we not try to make it up to the Bay of Islands because that would be a 7 hour round-trip. So, after sitting around toiling over what to do for a while, we decided to go to the thermal pools at Weiwera, which was one of the suggestions made at the i-site. It was not really what we were expecting. There were several luke-warm pools and a water-slide complex. It looked to be geared towards families, and therefore wasn’t really what we were looking for. But, we made the best of it by getting a 30-minute private spa and riding a few waterslides.
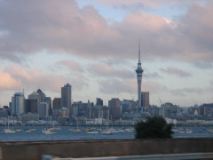
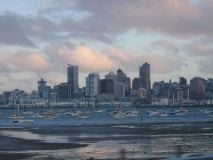
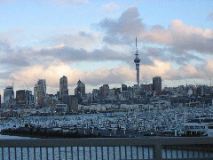
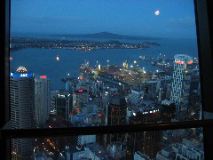
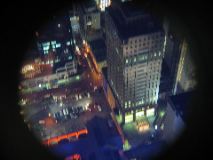
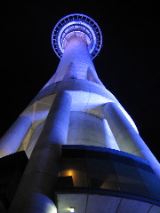
Afterwards, we headed back downtown to go up the Skytower. The Skytower is by far the tallest building in New Zealand, and in fact is the tallest building in the Southern Hemisphere. It is about twice as tall as any of the other buildings in Auckland, which really makes it dominate the skyline. The only uses for the tower are telecommunications and visitor-related activities. These activities include two general observation decks, the upper and lower; an upper, upper observation deck that is only accessible on a guided tour in which you climb up the interior of the tower, two restaurants, a rotating bar, and the Sky Jump, which is an arrested freefall from 192 meters above the ground (using two wires on either side of you to keep you at 60 mph).
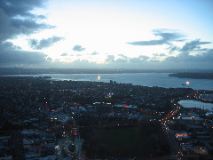
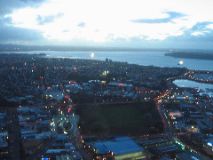
We drove around in downtown for a bit to find a parking lot that would fit the van, but eventually found one a couple of blocks from the tower. We checked on our dining options and opted for the buffet dinner at The Observatory (the other option was to eat at the rotating restaurant, which would have required us to wait a couple of hours). We first headed to the lower observation floor before dinner so that we could see the view before it got totally dark (sunset had already occurred about 30 minutes before). We took a couple of extended exposure pictures, called a few holiday parks in Auckland, and then headed up to the next level for dinner. They first served the main course, a fancily prepared meat dish. Then, we hit the buffet. It was an excellent buffet, consisting of a bar full of fish/sushi, chicken, potatoes, and ham and salad-type appetizers. It was topped off by a desert bar chocked full of irresistible sweets. Needless to say, we were stuffed.
After dinner, we paid the $3 to go to the upper observation deck, which wasn’t too much more impressive than the lower observation deck, even though it was significantly higher (about 40 meters-ish). Before leaving, we hit the giftshop in the lobby. We weren’t quite ready to call it a night, so we wondered around the casino that is in a building attached to the bottom of the tower. We didn’t have much luck finding low-stakes slot machines, so we only burned $4 at the 10¢ slots and moved on. We headed to the Silverfern Holiday Park in Berkenhead (about a 20-minute drive) for our last night in New Zealand.
Pictures
IMG_1496
|
IMG_1497
|
IMG_1498
|
IMG_1499
|

IMG_1500
|
IMG_1501
|

IMG_1502
|
IMG_1503
|
IMG_1504
|
IMG_1505
|
IMG_1506
|
IMG_1507
|
IMG_1508
|
IMG_1509
|
IMG_1510
|
IMG_1511
|

IMG_1512
|
IMG_1513
|
IMG_1514
|
IMG_1515
|
IMG_1516
|

IMG_1517
|
IMG_1519
|
IMG_1521
|
IMG_1526
|
IMG_1528
|
IMG_1529
|
IMG_1532
|
IMG_1534
|
IMG_1536
|
IMG_1538
|
IMG_1540
|
IMG_1545
|